You’ll seal your bathroom against water damage and mold by using 100% silicone caulk on joints where walls meet tiles, around tubs, and along baseboards. First, remove old caulk completely, then clean surfaces with mildew-resistant cleaner and isopropyl alcohol until totally dry. Apply your silicone bead, smooth it immediately with a damp finger, and wait 24–48 hours for full cure. Inspect every few months and recaulk every 5–10 years. Follow these specific steps to keep your bathroom watertight.
Why 100% Silicone Works Best

Why does 100% silicone work so much better than other caulking options in your bathroom? A quality silicone sealant creates a waterproof barrier that protects your tiles and fixtures from water damage. When you’re sealing joints around your tub or shower, you need something that moves with temperature changes without cracking. 100% silicone does this effectively.
What really sets bathroom caulking apart is mold resistance. Most silicone products marketed for bath/shower use include an anti-fungal additive that keeps mold from growing in those damp corners. Unlike acrylic options, silicone bonds strongly to ceramic, porcelain, and glass surfaces—exactly what you’re working with.
The flexible joints stay intact year after year, giving you a long-lasting seal. For tile and fixture adhesion in wet environments, 100% silicone is your best choice.
Where Your Bathroom Needs Caulk

Now that you know 100% silicone is your best choice, let’s identify the specific spots in your bathroom where you’ll actually need to apply it. I’d start with the bath and shower enclosure joints where walls meet tile or tub. The spout-to-wall seam needs caulking to prevent water from sneaking behind surfaces. Don’t forget the tub-to-wall transitions—these are prime spots for mold growth if left unsealed. Baseboards and floor-to-wall corners near wet zones also benefit from your waterproof sealant. Before you grab your caulk gun, remove old caulk completely and clean those areas thoroughly. Proper surface preparation helps your silicone caulk bond well. Taking time upfront with these spots prevents costly water damage and keeps mold resistance strong throughout your bathroom.
Remove Old Caulk Completely

Before you apply that fresh silicone caulk, you’ve got to remove the old stuff completely—and I mean down to the bare surface underneath. I use a utility knife or caulk removal tool to cut along the edges and work in sections. If the old caulk won’t budge, I apply a caulk softener solution to loosen it first. My scraping technique involves steady, controlled pressure rather than aggressive force.
Once I’ve removed the bulk material, I grab a clean rag and wipe the entire area thoroughly. I then do an alcohol wipe with rubbing alcohol to eliminate any residue. This step matters because a clean plaster or substrate allows proper bonding. Finally, I wait until the dry surface is completely moisture-free before applying new caulk. This bonding preparation takes patience but delivers professional results.
Clean and Dry Your Bathroom Surfaces

Surface prep is the foundation for caulk that actually sticks around. I’ll walk you through this step so your caulk adhesion stays strong.
Surface prep is the foundation for caulk that actually sticks around—don’t skip this crucial step for strong adhesion.
Here’s what you need to do:
- Clean with mildew-resistant bathroom cleaner to remove soap scum and mineral deposits
- Wipe down with 70% isopropyl alcohol to eliminate oils that block bonding
- Use a hair dryer to speed surface drying in humid bathrooms
- Apply painter’s tape around tile seams for crisp edging technique
- Allow complete air drying before caulking to prevent trapped moisture
This moisture prevention step protects your finish smoothing results. Don’t rush this phase. When surfaces are truly dry, your decorator’s caulk performs exactly as intended, creating durable seals that last.
Pick the Right Silicone Caulk

When you’re picking caulk for your bathroom, you’ll want 100% silicone instead of acrylic because silicone actually repels water and resists mold far better in wet areas. Look for silicone products that specifically say they have mold or mildew protection—these additives can keep your caulk looking clean for 15 to 20 years if you apply it right. You’ve got color options like clear, white, grey, or beige that’ll match your tiles and fixtures, though clear caulk shows soap scum more easily than the lighter shades do.
Silicone vs. Acrylic Options
Silicone vs. Acrylic Options
Why does silicone outperform acrylic in bathrooms? Here are the key differences between these caulk types for your bathroom caulking project.
Silicone sealants deliver superior performance in wet environments. Here’s what sets them apart:
- Create a waterproof seal lasting 15–20 years with proper application
- Resist mold and mildew through anti-fungal additives
- Remain flexible and durable around bathroom joints and tubs
- Offer quick-curing silicone options ready in 30 minutes to 2 hours
- Come in multiple color options, including clear finishes
Acrylic latex caulk works better for trim and woodwork since it’s paintable but lacks water resistance for high-moisture zones. For bathroom caulking, 100% silicone sealants prevent premature failure and reduce maintenance needs. Silicone is the better choice for water exposure areas.
Waterproof And Mold-Resistant
To keep your bathroom sealed tight and mold-free, you’ll want to grab 100% silicone caulk for any wet areas like shower surrounds, tub edges, and tile joints. This bathroom sealant delivers waterproofing that lasts because silicone caulk flexes with temperature changes without cracking.
Look for products with anti-mildew additives or mold resistance built in. These formulas protect your joints for the sealant’s entire lifespan when you apply them correctly.
Quick-curing silicone options let you use your shower the same day—they’re water-ready in 30 minutes to 2 hours. Pick a caulk color match that blends with your fixtures: clear, white, almond, or grey work best. Proper caulk removal and prep, plus a solid finishing technique, keep your bathroom waterproofing strong for years.
Color-Matching Your Bathroom
How you color-match your caulk affects how polished your bathroom looks.
Selecting the right silicone caulk color ties your whole bath/shower space together. Consider these color-matching options:
- White caulk – the most popular choice for traditional bathrooms
- Almond/Bone – pairs beautifully with cream fixtures
- Grey – complements modern bathroom fixtures
- Clear silicone – versatile but shows soap scum easily
- Mold/mildew protection – available in all color options
Match your caulk to your bathroom fixtures rather than tiles. This strategy keeps your space visually cohesive as fixtures age. If you’re unsure, choose White caulk with mold/mildew protection—it’s reliable and low-maintenance. When you apply that smooth bead of color-matched silicone caulk, you’ll achieve a polished finish that lasts.
Apply Your Caulk Bead Like a Pro

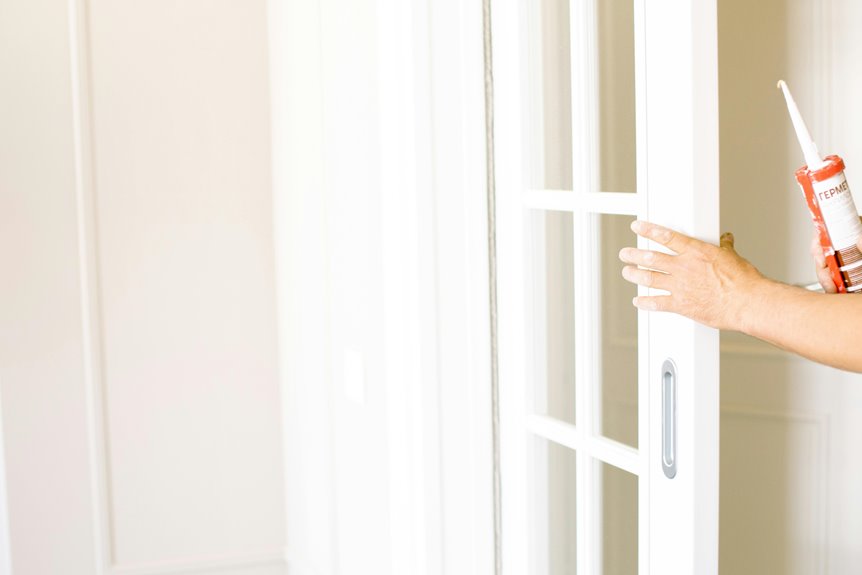
Once you’ve got your caulk gun loaded and ready, it’s time to focus on the technique that’ll make your work look professional. Start by cutting your nozzle at a 45-degree angle and puncturing the inner seal to control your bead size. Hold the gun at that same 45-degree angle and apply steady pressure as you move from corners outward along the seam.
For crisp masking edges, use painter’s tape before applying. You can smooth the bead using the finger technique with a damp finger or a finish tool, re-wetting as needed for a uniform concave line. Remove the tape while your caulk stays wet to prevent pull-away. With silicone caulk, this wet finish produces a professional result that sheds water effectively.
Smooth Your Caulk for a Polished Finish

Getting that smooth, professional-looking bead requires you to act quickly after you’ve applied your caulk. I’m going to walk you through the techniques that’ll give you those crisp lines and a polished finish.
Here’s what works best for smoothing the caulk:
- Use the finger method with a damp finger and soapy water for a smooth, concave bead
- Apply the tape method by placing masking tape on both sides before caulking for crisp lines
- Start smoothing immediately while the bead is still workable
- Use a finishing tool or damp finger, re-wetting as needed
- Remove excess caulk with paper towels and reapply where gaps appear
Clean and dry your surfaces beforehand. This bathroom caulking technique prevents mold and gives you that professional appearance you’re aiming for.
How Long Until Your Caulk Is Ready

The waiting period after you’ve smoothed your caulk is just as important as the application itself. Most bathroom caulking products need 24 to 48 hours for full cure, though modern silicone caulk can be shower-ready in 30 minutes to 2 hours for light use. Your caulk cure time follows stages: tack-free time happens in 10–30 minutes, then a light cure stage allows limited handling within 1–4 hours. Full cure and maximum chemical resistance require the complete curing schedule. Check your product label for exact timing since humidity and temperature impact drying. Ventilation speeds the process and reduces odors. Moisture can compromise your work before full cure finishes, so patience protects your investment.
Maintain Your Caulk to Prevent Mold and Water Damage

How’s your bathroom caulk holding up after a few months? I’ve learned that caulk maintenance is important for keeping water damage and mold at bay. Here’s what I do to protect my bathroom sealant:
- Inspect caulked joints every few months for cracks, peeling, or discoloration
- Clean surfaces with mildew-resistant cleaners to prevent mold growth underneath
- Use mold/mildew-resistant silicone sealant when resealing areas
- Maintain ventilation during and after application for proper curing
- Schedule recaulk timing every 5–10 years or sooner if needed
Before any recaulk project, I treat underlying mold with hydrogen peroxide and keep surfaces completely dry. This water damage prevention approach keeps my bathroom protected and extends my sealant’s lifespan considerably.