Layer statement curtains with complementary fabrics, create a gallery wall with meaningful artwork, and add fresh herbs in terra-cotta pots. Choose a bold cabinet color or backsplash as your design anchor, then style open shelving with both functional items and display pieces. Mix hard surfaces like quartz with soft textures—linen towels and plush fabrics work well. Incorporate vintage pieces and brass accents to add depth. Work with existing features rather than against them, letting everything work together with purpose. Each strategy builds on the others for a unified appearance.
Pick Statement Curtains to Layer in Texture and Pattern

Why settle for plain kitchen windows when curtains can change your space? Layered curtains add both texture and visual interest to kitchens. You can pair different fabrics to create depth—try combining a bold patterned curtain like a Schumacher design with a solid neutral backdrop. This layering technique softens your kitchen while complementing bold backsplash or hardware accents.
I repurpose fabric with memories into custom curtains tailored to fit my windows perfectly. This approach beats installing traditional cabinetry and costs less. The texture from layered curtains stands out against chrome green walls and other design elements, creating warmth and personality.
Start by measuring your window width and height. Choose your statement curtain fabric first, then select a complementary layer. You’ll create a kitchen that feels like you.
Create a Gallery Wall for Art and Focal Point Interest

A gallery wall turns a blank kitchen space into a personal focal point that tells your story. Start by selecting meaningful artwork—family photos, prints, or canvases—that reflect who you are. Arrange pieces in a cohesive layout before hanging anything. Use picture lighting to highlight your favorite works and create mood throughout the space. Strategic lighting choices draw attention to oversized canvases and anchor adjacent rooms together. Mix frame styles and sizes for visual interest while maintaining a curated feel. Position your gallery wall where it naturally draws the eye—above a console table or spanning a prominent wall section. This approach turns empty walls into dynamic narratives that connect your kitchen with adjoining spaces, creating that lived-in warmth you’re seeking.
Add Fresh Herbs and Plants to Brighten Your Space

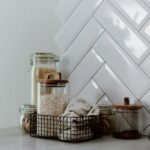
Fresh herbs and plants add natural life to your kitchen. Potted herbs on your countertop serve double duty as both decoration and fresh ingredients. Terra-cotta vessels provide warmth and contrast beautifully against sleek cabinetry.
Creating a small herb garden on open shelving maximizes natural light while keeping plants accessible. Rotating basil, rosemary, and mint near your sunniest window works well. Greenery adds natural tones that tie your kitchen together and create a welcoming atmosphere.
Fresh herbs release aromatic scents throughout the day, making your space feel alive. Position your potted plants where they’ll receive adequate sunlight—most indoor herbs need at least six hours daily. This addition improves how your kitchen feels and functions.
Layer in Antique or Vintage Pieces for Character

While modern kitchens often feel sleek and minimal, antique and vintage pieces can bring warmth and history to your space. Layered decor creates a lived-in quality that makes your kitchen welcoming.
Start by displaying antique pieces as functional items. A vintage bar cart becomes a focal point while holding your favorite bottles and glasses. On open shelving, arrange oyster tins or vintage containers to nod to your regional roots while adding color and character.
Display antique pieces as functional décor—a vintage bar cart becomes an instant focal point while serving your everyday needs.
Replace generic accents with collected antique carvings and mirrors. These softening touches prevent that cold, sterile look. The key is balancing vintage decor with modern surroundings—don’t overwhelm contemporary features with too many pieces.
Choose items that reflect your personal story. Each antique brings meaning and depth, creating a kitchen that represents your tastes and experiences.
Choose a Bold Cabinet Color or Dramatic Backsplash

Why settle for plain white cabinets when you can make a real design statement? I’m talking about choosing a bold cabinet color that completely changes your kitchen’s appearance. Consider robin’s egg blue, gray, or green tones—colors that make your space feel deliberate and striking. Here’s how to pull it together: 1) Select your cabinet color first, letting it drive your whole design. 2) Pair it with a coordinated backsplash, like gray and white tile, to support your bold choice. 3) Let the cabinet color become your main feature rather than fighting against it. This approach means every element works together with purpose. When you commit to a dramatic backsplash or bold cabinet color, you’re creating a kitchen that actually belongs to you—not just any kitchen.
Maximize Natural Light by Positioning Decor Strategically

I’ve found that strategically positioning decor around windows affects how natural light moves through my kitchen throughout the day. You can create a window garden with herbs and light-colored plants on shallow shelves, or hang glass-front cabinets nearby to let sunlight bounce deeper into the space. Arranging artwork and reflective pieces like brass accents or white backsplashes to face your windows amplifies that natural glow and keeps everything feeling bright and open.
Window Garden Arrangements
How can you turn your kitchen window into a thriving garden that brightens your whole space? I’ve found that ceiling-hung shelving works well for displaying your window into a productive area. Position herbs and light-loving plants on tiered shelves to catch southern-facing light throughout the day. This setup keeps your indoor plants visible while maximizing natural light exposure for better growth.
| Plant Type | Light Needs | Best Location | Benefits |
|---|---|---|---|
| Basil | 6-8 hours | South-facing shelf | Fresh cooking ingredient |
| Mint | 4-6 hours | Mid-level shelf | Air freshening |
| Parsley | 5-7 hours | Upper shelf | Visual greenery |
| Thyme | 6+ hours | Brightest spot | Culinary use |
Your window garden connects your kitchen to the outdoors, creating warmth and freshness while linking your cooking space to nature.
Light-Filled Display Strategies
Once you’ve established your window garden, the next step is maximizing that organic light throughout your entire kitchen by placing your decor strategically. I recommend positioning lightweight, reflective pieces near windows to bounce sunlight deeper into shadowed corners. For your kitchen display, use glass-front cabinets on open shelving—they keep sightlines clear while showing off your favorite items without blocking light. Choose light-colored containers and avoid clutter on surfaces. Hang sheer curtains that filter daylight while maintaining privacy. Add framed art with picture lights on window-facing walls to create focal points naturally. Keep vertical storage organized and minimal. These moves work together to brighten your entire space, making your kitchen feel more open and welcoming. You’ll notice how thoughtful placement affects how light moves through your room.
Natural Glow Optimization
The placement of your decorative pieces matters as much as what you choose. Strategic positioning affects how natural light moves through your kitchen.
Here’s what works: place open shelving near windows so sunlight reaches your working zones directly. Position artwork and greenery in your direct line of sight from the main seating area—this keeps daylight warmth visible without creating glare.
Install reflective surfaces like mirrored backsplashes or glass containers on countertops. These bounce light around, multiplying its effect throughout your kitchen.
Consider ceiling-hung shelving for window gardens. This brings greenery indoors while allowing natural light to filter down into darker corners.
The result? Your kitchen feels larger, brighter, and genuinely welcoming to everyone who enters.
Work With Existing Kitchen Features Instead of Hiding Them

Why cover up what’s already working in your kitchen? Your existing brick, original finishes, and architectural bones deserve attention. Start by creating a cohesive color plan that honors these features instead of fighting them. Pair brass accents with black elements to balance what’s already there and create focal points.
Replace crowded upper cabinetry with open shelves to showcase coordinated items and keep your space feeling airy. A bold kitchen island in panda quartzite becomes a central design element that complements rather than clashes. Use pieces that serve double duty—a bar cart or shelving unit balances storage with style. Add lime green artwork or Tolix stools to soften brick presence gently. When you work with what you have, your kitchen develops naturally and feels like your own.
Style Open Shelving With Both Function and Aesthetics

Open shelving works best when you balance everyday items with pieces that look good, so you’re not just storing things—you’re displaying them with purpose. Group related items together (like stacking your cutting boards near your bowls) and mix in decorative pieces such as small plants or cookbooks to break up the practical items. When your shelves feel organized and purposeful rather than cluttered, they’ll make your kitchen feel more open and inviting instead of messy.
Balancing Function And Beauty
How do you make open shelves work hard and look great at the same time? I’ve found that mixing everyday items with display pieces creates balance on your storage space. Keep cutting boards and pitchers alongside decorative objects so everything serves a purpose.
Here’s what I do: I group related items together—all your mugs in one section, bowls in another. This prevents clutter while making things easy to grab when cooking. I also use brass brackets and green tile as bold accents that pull the design together.
The real trick? Rotate your display pieces seasonally. This keeps your open shelving fresh without needing major changes. Your kitchen stays functional for daily cooking while looking deliberate and welcoming. That’s when your space truly feels like home.
Curating Intentional Shelf Displays
The key to open shelving is treating each shelf as a purposeful arrangement rather than a storage area. Group related items together—spices, vessels, and small hardware—creating organized clusters that function well and look deliberate. Style each shelf by combining functional objects with decorative pieces, balancing heights, textures, and materials like wood, glass, and metal for visual consistency. Display greenery between cutting boards and pitchers adds visual interest and softens the appearance. Place frequently used items at eye level for convenient access while showcasing selected pieces during open layouts.
| Shelf Level | Primary Items | Styling Tips |
|---|---|---|
| Upper | Decorative vessels, display greenery | Mix heights, use negative space |
| Middle | Daily-use items, small hardware | Group by category, balance textures |
| Lower | Heavier pieces, cookbooks | Anchor with solid items |
Show Off Collections and Objects That Matter to You

Your kitchen’s shelves and counters are the perfect place to tell your story. I arrange my displayable collections alongside everyday items to create balance. Mix cutting boards, pitchers, and vintage vessels on open shelving to blend function with style. This approach makes practical storage into personal display.
Your kitchen shelves tell your story when you blend displayable collections with everyday items, mixing function and personal style.
Here’s how I do it:
- Group similar items together—stack cutting boards upright or lean them against the wall
- Layer handmade vases and glass jars with greenery to add color and texture
- Include pieces that matter to you, whether inherited dishes or travel souvenirs
- Alternate decorative and utilitarian objects so nothing looks too staged
Your kitchen becomes a reflection of who you are when you showcase what you genuinely love and use daily.
Mix Hard Surfaces With Soft Textures for Warmth

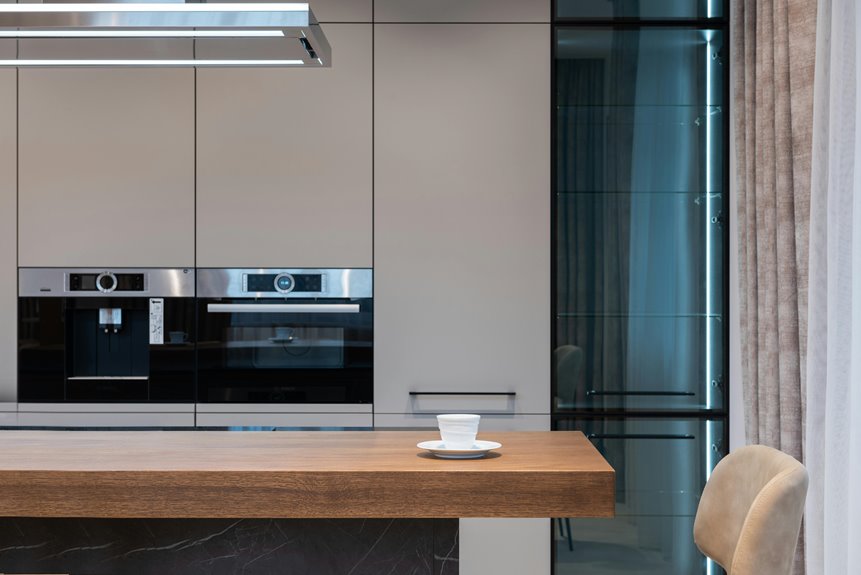
I’ve found that pairing hard kitchen surfaces like quartz countertops, brass accents, and tile with soft fabric elements like curtains and textiles creates a more inviting space that doesn’t feel cold or industrial. You can balance materials strategically by choosing contrasting textures—think smooth counters next to rugged zellige tiles and plush fabrics—which provides visual depth while keeping everything practical and functional. Using soft furnishings to conceal utilitarian items like bins and water filters also lets you maintain that warm atmosphere without sacrificing the clean look you want.
Fabric Elements Add Warmth
When you’ve got a kitchen filled with stainless steel appliances, tile counters, and hard cabinet edges, soft fabrics become an effective tool for creating a warmer, more inviting space. I’ve found that strategically placed fabric elements change how your kitchen feels.
Consider these fabric solutions:
- Hang curtains under the sink to conceal bins and water filters while introducing softness
- Layer cafe curtains on windows to bring in pattern and color
- Use fabric panels on open shelving to soften exposed lines
- Drape linen towels visibly for tactile contrast against metal fixtures
The texture from curtains and textiles balances utilitarian areas well. When you blend these soft elements with hard surfaces, you’re not sacrificing functionality—you’re increasing comfort. Your kitchen becomes a space where warmth and practicality work together smoothly.
Balance Materials Strategically
Fabric elements alone won’t complete the warmth equation—you’ve got to think about how different materials work together. Balancing materials strategically is important for your kitchen decor ideas.
Mix hard surfaces like brass accents, black cabinetry, and tile with soft textures such as linen curtains or woven placemats. This contrast prevents your space from feeling cold or industrial. Layer natural materials too—terra-cotta vessels and greenery soften sleek stone countertops and metal hardware.
Use open shelving to display both functional items and decorative pieces. This combination breaks up the starkness of exposed cabinetry. Add fabric elements where upper cabinets are skipped, introducing warmth without sacrificing storage space.
When you highlight focal features like a bold backsplash, pair them with complementary soft textures. This thoughtful approach creates an inviting kitchen that demonstrates careful planning and balance.