
Start by photographing each decorated room to guide your packing later. Clean and inspect all decorations, then sort items by category and color into labeled bins. Store sturdy pieces in your garage, delicate fabrics in closets with garment bags, and lights wound around cardboard tubes in stackable totes. Add 4–12 silica packets per bin to control moisture. Label everything with contents and handling instructions, including a photo on each container. Run a final checklist before sealing, and you’ll find specific techniques for wreaths, garlands, and specialty items that’ll save you hours next December.
Start With a Photo Inventory of Your Christmas Setup

Why spend next December hunting through boxes to remember how you decorated this year? Taking photos of your setup creates a practical visual reference that saves time next season.
Start by photographing each decorated room—trees, mantels, shelves, and tabletops. Capture close-ups of ornaments, ribbons, and wreaths too. These images become your photo inventory for quick recall.
Create a digital album named “Christmas 2025 Decor” on your phone or computer for easy access. As you pack decorations into storage containers, use these photos to guide your labeling system. Snap pictures of ornament arrangements and wreath placements so you’ll remember exactly how everything looked.
During packing, review your photos and decide what to keep, discard, or repair. This editing process, paired with your photo inventory, helps your storage containers stay organized logically and allows you to locate items quickly next year.
Clean and Repair Decorations Before Packing

Before you pack anything away, make sure your fabric items and linens are actually clean—wash or dry-clean stockings and table linens to remove stains and odors that could set in during storage. While you’re at it, inspect everything for damage like loose seams, broken hooks, or missing attachments, and either repair them now or decide if the item’s worth keeping. Taking care of these tasks upfront saves you from discovering ruined decorations next December.
Fabric Items and Linens
How you prepare fabric decorations affects how well they hold up for next year. Taking time now helps prevent problems later. Here’s what I do with my fabric items:
- Wash or dry-clean stockings and table linens before storing to prevent mildew and odors
- Wipe down fabric decor and check for loose hooks or broken attachments, tightening or repairing as needed
- Label items by category like stockings, table linens, and fabric garlands for easy next-year setup
I use vacuum storage containers to maximize space while protecting bulky fabric items from moisture. Then I store everything in a dedicated bin or garment bag to minimize dust and crushing. Keeping items flat helps them stay crease-free and ready to use when the season returns.
Inspect and Fix Damage
Now that your fabric items are prepped and organized, it’s time to give all your decorations a thorough once-over before they go into storage. I check each ornament, candlestick, and decorative object for dust and grime that could damage finishes over time. Wiping them down takes just minutes and protects your pieces.
Next, I inspect hooks, hangers, and attachments carefully. Loose or missing hardware can cause damage during storage and moving. I tighten screws on tabletop trees and wreath hangers for stability.
Finally, I assess whether items need repair. I fix broken attachments or tighten loose parts myself. If something’s beyond repair, I discard it rather than pack unusable pieces. This prevents clutter and keeps only decorations you’ll actually display next year.
Sort Christmas Decorations by Category and Color

Why does sorting matter when you’re packing away decorations? Organization saves you time and frustration next December. When I sort by category and color, I keep storage manageable and accessible.
Here’s my approach:
- Group like items together — I keep all red ornaments in one bin, white ornaments in another, and gold pieces separate. This ornament storage system prevents damage and makes tree decoration faster.
- Label each container clearly — I write the category and color directly on bins so I don’t need to open them during setup.
- Store related accents together — I keep bells, figurines, and tabletop trees in the same bin since they work as coordinated sets.
I also label wreaths and garlands by their intended display areas. This strategy means everything matches perfectly when you’re decorating.
Decide Where to Store Your Christmas Decorations?

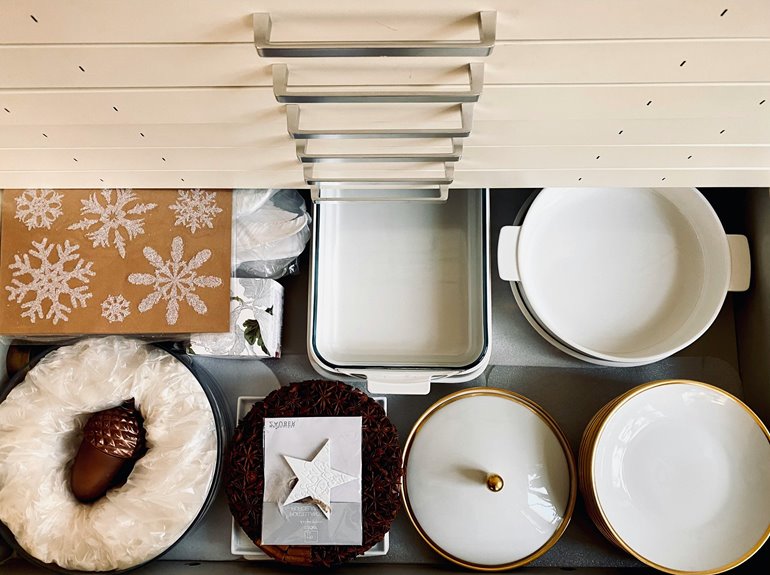
Once you’ve sorted your decorations by category and color, picking the right storage spot is important. I recommend matching your storage location to your items’ needs. Baskets work well for decorations in clear plastic containers placed off the concrete floor. Attics suit sturdy items, but skip candles and glue-based decor there. Garages handle outdoor and unbreakable pieces nicely—just seal your containers to keep pests out. Closets are perfect for fabric items like wreaths and garland stored in garment bags. The key is using labeled, category-based storage across all locations. This approach protects your decorations’ longevity and simplifies finding everything next season. You’ll save time and frustration when you know exactly where everything belongs.
Choose the Right Storage Container for Each Item Type

I’ve found that using clear containers helps you spot what you need without opening every box, and pairing them with specialty containers—like padded ornament boxes, wreath storage bags, and stackable light organizers—keeps each decoration type safe and organized. When you group similar items together in their own dedicated containers, you’re preventing crushing, tangling, and those frustrating moments when you can’t remember where you packed something. Label each bin by category and consider snapping a quick photo of the contents so you’ll know exactly what’s inside when December rolls around again.
Clear Containers For Visibility
How you store your decorations matters just as much as what you store. Clear bins let you see what’s inside without opening containers. This saves time and helps you spot damage before the holidays arrive.
Here’s what I recommend:
- Use smaller clear shoebox-size bins for ornaments, ribbons, and small accents to prevent shifting and breakage during storage.
- Label each container with its category and color, like “Red Ornaments” or “Garland,” so you’ll find items quickly next season.
- Pair clear storage containers with tissue or bubble wrap inside to protect fragile decor while maintaining visibility.
When you choose clear totes with built-in visibility for delicate items like glass ornaments, you minimize handling while keeping everything organized.
Specialty Boxes By Category
Why settle for one generic storage container when different decorations need different protection? Specialty boxes make a real difference in keeping your collection safe year after year.
For ornament storage, use boxes with removable dividers that protect delicate pieces while accommodating larger items when needed. Wreath storage requires dedicated containers that either stack neatly or hang on walls, preventing crushing and maintaining their shape throughout the off-season.
Light reels deserve stackable organizers with built-in reels and hinged lids—these prevent tangling and make finding what you need simple. For fully decorated trees, upright or rolling tree storage bags offer easy transport and complete protection.
Label each container by category like “red ornaments” or “evergreen garland.” This system speeds up retrieval and keeps your organization solid across multiple years.
Pack Ornaments in Compartmentalized Boxes

When you’re packing away your ornaments, compartmentalized storage boxes keep everything safe and organized. This approach makes ornament storage manageable and straightforward.
Here’s how to do it:
- Place each ornament in its own compartment, using tissue paper or bubble wrap for cushioning
- Fill boxes three-quarters full to prevent shifting during storage and transport
- Top everything with bubble wrap for an extra protection layer
For smaller pieces, use clear, stackable boxes or egg-carton-style organizers so you can see what’s inside without opening them. This method saves time when December arrives. You’ll locate specific ornaments quickly and set up your tree efficiently when everything’s properly protected and visible.
Store String Lights on Cardboard to Prevent Tangling

String lights are just as important to protect as your ornaments, and they need their own storage strategy. Wrapping lights around leftover cardboard is an effective way to prevent tangling during storage.
| Method | Materials | Benefit |
|---|---|---|
| Cardboard Coiling | Cardboard tubes, tape | Compact, organized |
| Nested Reels | Bubble wrap, tissue | Extra protection |
| Slotted Adaptation | Cardboard, scissors | DIY-friendly |
Start by winding your Christmas lights tightly around cardboard. Wrap the ends with tape so they don’t uncoil. Place each coil in a stackable tote with enough height to protect delicate bulbs. For added security, nest smaller reels inside each other with tissue between layers. This storage method keeps your lights untangled and ready for next season’s display.
Keep Wreaths and Garland From Getting Crushed

I’ve learned that keeping wreaths and garland in great shape for next year means storing them smartly—and that starts with giving each piece its own dedicated container or wreath storage bag so they won’t get squished together. You can also hang them vertically on walls using sturdy hooks or nails, or slip them onto coat hangers and store them in garment bags, which keeps them visible and protects their fullness. The key is avoiding those cramped totes where everything gets flattened and loses its original fluffiness.
Dedicated Container Storage
Wreaths and garland need their own space if you want them looking fresh next year. Dedicated wreath storage containers protect your pieces from getting crushed in a crowded closet. Here’s what works best:
- Store each wreath or garland in its own container to prevent crushing and maintain its original shape
- Use stackable storage containers or wall-hung options that keep pieces accessible without piling pressure on delicate elements
- Line boxes with tissue paper or packing material to cushion ornaments and fragile decorations
For wreaths without hanging loops, slip them onto coat hangers and enclose them in trash bags. This keeps everything contained and preserved. Label your storage containers by room—mantel, doorway, entryway—so you’ll know exactly where everything goes when decorating season returns.
Vertical Wall Organization
How can you protect your wreaths and garland from damage while keeping them easy to find? Vertical wall storage keeps my decorations visible and accessible without crushing delicate embellishments. Using over-the-door racks or wall-mounted systems prevents tangling and deformation that happens with stacking.
| Storage Method | Best For | Benefits |
|---|---|---|
| Over-the-door racks | Multiple garlands | Easy access, space-saving |
| Wall-hung hooks | Individual wreaths | Prevents crushing, visible |
| Wreath containers | Delicate designs | Protection from dust, mess |
For wreaths without loops, I slip them onto coat hangers before storing in wreath containers or trash bags. Labeling each spot—mantel, doorway, or wall section—helps me quickly retrieve pieces without handling them repeatedly. This approach keeps everything organized and ready for next season.
Hang Decorations in Storage to Maximize Space

Why waste precious storage space stuffing wreaths and garland into bulky totes when you can hang them instead? Vertical hanging changes how you store your decorations. Here’s what works best:
- Use long nails or sturdy hooks along closet walls or under-stair spaces to drape garland and hang wreaths, keeping them visible and accessible.
- Slip wreaths without hanging loops onto coat hangers and cover with trash bags to contain mess while preserving their shape.
- Wrap bows around coat hangers with ribbon intact to maintain their presentation and prevent crushing.
This approach saves significant tote space while protecting your decorations from damage. Your wreath stays fluffed, your garland stays fresh, and you’ll spend less time fluffing next season. Storage becomes simpler when you think vertically instead of horizontally.
Add Silica Packets to Control Moisture in Every Bin

Moisture is one of the biggest threats to your stored decorations, and it’s something you can actually control. I use silica packets in every bin to manage this problem effectively.
Start by placing 4–6 packets in medium totes and 8–12 in larger bins. These packets absorb moisture that could otherwise damage your ornaments and garland. Here’s what I do: I keep the packets away from delicate items by placing them on the bin lid or surrounding padding so they won’t touch anything fragile.
The key to effective moisture control is refreshing your silica packets annually. Over time, they lose their absorption power. I pair this strategy with storage containers that allow air circulation and clean decorations before packing them. This combination protects your holiday items during their long storage period.
Place Frequently Used Items on Lower Shelves for Easy Access
Once you’ve protected your decorations from moisture, it’s time to organize them for quick access during the holiday season.
I store my most-used items on lower shelves where I can grab them without stretching or bending. Here’s how I keep everything accessible:
- Place frequently used garland, lights, and small accents on middle-to-low shelves to reduce strain
- Use clear plastic storage containers on bottom shelves so you see contents at a glance
- Reserve high shelves for bulk wraps and seasonal backup items you rarely need
I use open or shallow clear plastic bins that let me spot ornaments and ribbons instantly. By keeping everyday decorating supplies within arm’s reach, I minimize digging through stacks. This setup means less time searching and more time decorating with your family.
Label Every Bin With Contents and Year

How do you find that box of blue ornaments next December without opening ten containers? Labeling your storage boxes is the answer. Create a simple system that works for you year after year.
| Category | Color | Tree Association |
|---|---|---|
| Ornaments | Blue | Bedroom tree |
| Lights | Warm white | Living room |
| Garland | Gold | Entryway |
Write your labels clearly on the exterior of each tote. Include the contents and year on every label. Add a quick photo of what’s inside for visual reference. Note special handling instructions like “fragile” or “unbreakable.” Update your labels whenever you purge or relocate items. This consistency keeps your decorating process smooth and organized for 2026 and beyond.
Run a Final Checklist Before Sealing Boxes

Before you seal up that final box, run through a quick checklist to make sure everything’s ready for storage. This final checklist prevents headaches when you unpack next December.
Before sealing boxes, run through a final checklist to prevent headaches when unpacking next December.
- Verify all items are clean and dry before sealing boxes for Christmas storage
- Confirm every bin has a label with category, color, and contents notes or photos
- Check that fragile ornaments have tissue wrap and silica packets are placed inside each tote
Make sure lights aren’t tangled and garland isn’t bent tightly. Confirm moisture control packets are in every container. Double-check that broken pieces went into your giveaway or discard bag, not into storage. Take one final photo of your labeled bins for your records. Everything is now ready to store safely until next year’s decorating season arrives.